
How To Create A DIY Slackline?
As an Amazon Associate I earn from qualifying purchases.
In recent years, slacklining has become a popular sport that uses balance and combines it with your skill to walk a line strung between two points that are fixed. DIY Slackline may be done in your backyard, on a university campus, along a canyon, or even thousands of feet above the ground.
Slacklining has many diverse purposes. It might be done for fun, for athletic performance, or the meditative relief from a hectic lifestyle. Slacklining is rather simple to do as long as you have the appropriate supplies, know-how to put it up, and perseverance to learn how to walk the line.
Step 1: Choosing Your Supplies
Choose strong tubular webbing for the slackline and slings. Slacklines are typically constructed from nylon ropes ranging from 1 to 2 inches (2.5 to 5 cm) wide. For the slackline, you’ll need a long piece and three “slings.”
No products found.
For the mainline, beginners should use a length of 50 feet. Begin with shorter lines of 10 to 15 feet. The cords, along with other accessories, are available online and at outdoor activity stores.
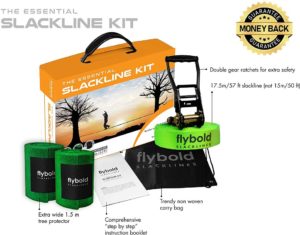
Purchase a slackline kit to get all of your materials in one go. Slackline kits are available online and from outdoor activity companies. You may make a slackline out of anything, including automobile tow lines or bungee cords.
Step 2: Find The Appropriate Location
It’s largely a matter of personal preference where to slackline. To keep the line in place, two things are generally required, such as trees. The ideal situation includes at least two trees 20 feet apart with no low-hanging branches obstructing our view while we’re on the line.
A single person can’t control the swing of a multicolored rope. The longer the line is, the more it will sway back and forth in the middle, and lower it will sag to the ground. I previously stated that one’s desire for distance and objects employed to tie down the line varies from person to person.
Step 3: Anchor Loop Construction
The mainline, which consists of two shorter lines or anchors, is strung between two trees and used to secure a DIY slackline. These lines, which are usually 10 to 15 feet long, are also composed of 1″ webbing and are the same size as the mainline.
To connect the two ends of the line, a basic water knot must be used, which is also known as a fisherman’s bend. Tie a knot, overhand and make sure to pull it tightly as to the end of the anchor line. Follow the connected end of the anchor back through the overhand knot with the other end of the anchor.
After that, repeat the procedure with the next 10 to 15-foot section of line to make two more anchor loops.
Tie a line around the tree once with one of the previously-made anchor loops, at roughly mid-thigh height. Then slide a carabiner through it, as shown in the photograph. Allow the carabiner/anchor combination to hang from the tree for the following few steps so that they may be completed.
Step 4: Connecting Your Line With The Anchor
As shown in the preceding photos, one of the rappel rings should be placed about 10″ from one end of the mainline. The mainline should be pulled through the ring to make a loop; this is known as loop 1.
Use loop 1 to go around and back through the rappel ring once again to make a second loop (loop 2) within loop 1. Clip carabiner 1 into loop 2 using carabiner 2.
This, when done correctly, should connect the anchor to the mainline without requiring any knots!
The other anchor loop (the second one) will be put up similarly to the first. The chain should wrap around the tree, at a height that measures roughly midway between its bottom and top branches. Instead of using one carabiner to connect the anchor around the tree, use two this time. Carabiner 2 on top and carabiner 3 on the bottom are both carabiners.
Step 6: The Final Carabiner
Take the line in your hand and walk 80% of the way to the second anchor loop, making sure that the mainline is not twisted, from the first anchor loop that was connected to the mainline.
When you reach the 80% mark, fit the rappel ring on top of the line and through it in a similar manner to the first. Use carabiner 4 to keep the ring in place.
Step 7: Connecting The Anchor Loop with The Main Line
Begin by ensuring that the line isn’t kinked. 3. Go up through carabiner 3. 4. Continue down through carabiner 2. The line should now be between itself after this procedure is complete. One last time, descend through carabiner 4 and insert it beneath the line that was previously in carabiner 4.
If you have a tree on your property, be sure to place any rope over the tree first. This will allow the line to be pulled taut, but before it can be pulled tight, you must install tree protection.
Step 8: Watch Out For The Trees!
If trees aren’t being used as anchoring objects, this process is not required. Towels must be placed between the anchors and the trees to preserve the bark. Fold a towel in half a few times and wedge it between the anchor and tree at both ends of the line while the line is loose.
Now your line is fully ready to be pulled tightly.
Step 9: Tighten Your Lines
Grab the long remaining tail to tighten the line. The tightness of the line is solely a matter of personal preference. To make sure that the line is as taut as necessary, two or three people may pull on it at once. If needed, this step may be repeated anytime the line becomes too loose during usage.
Step 10: Start Slacklining!
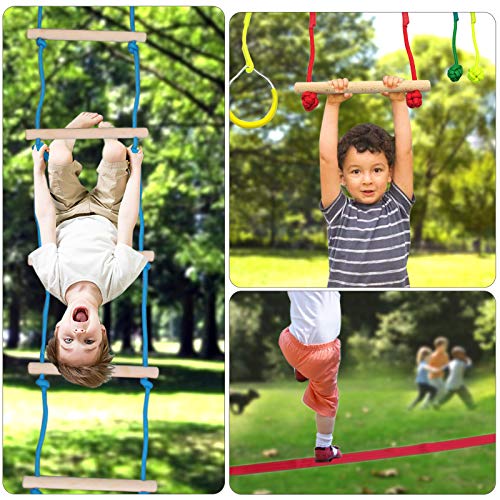
Now it’s time to start slacklining! Most people find that their legs cause the line to vibrate back and forth when they first walk on it. This is quite typical for someone who has never spent much time on a line! After some practice, the wobbles will cease.
Slacking is a fantastic exercise for kids. It’s also a great method to start since it doesn’t require any special equipment or expertise. In addition, slacklining without shoes on is the greatest way to begin.
To install your DIY slackline for the first time, stand near a tree and face the center of the line. Place your foot closest to the line on it; walking with your feet parallel to the line is important. Also, pick a fixed point farther down the line, usually at one of the trees.
Now that you’ve learned how to balance on one leg, it’s time to learn how to balance on two. Begin by drawing a line across the ground. Stand up and move your weight smoothly from one leg to the other, standing up. Attempt to stand upright without using both feet at first (balance on one foot).
Get into a deep stance. Keep your elbows out and your hands approximately shoulder-width apart, with your feet approximately shoulder-width apart. Begin by pushing off with one foot, then switch to the other after you’ve effortlessly performed this action on both feet. Now that you’re balanced on both feet, walk forward! It will take some time to become an expert slackliner.
Amazon and the Amazon logo are trademarks of Amazon.com, Inc, or its affiliates.

Welcome to my site. I am Clyde Rutz. I am 22 years old. I am a SlackLine specialist. You can ask any question to me. I will try to back soon as early as possible.


