
A Beginner’s Guide: How To Slackline?
As an Amazon Associate I earn from qualifying purchases.
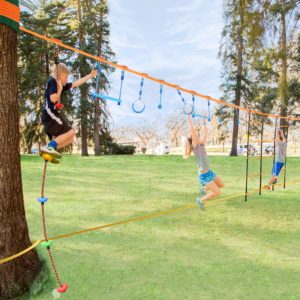
You’ve come to the proper spot if you’re new to slacklining or plan on being. See more: https://www.slacklinetechnology.com/
Slackliners first appeared in California roughly at the same time as rock climbing did. Despite being around for 50 years, it’s only recently that slacklining has become available, owing to the availability of commercial slackline kits and equipment. Slacklining has evolved into something much more prominent since the advent of YouTube and social media.
The concept of walking a 1 or 2-inch wide slackline might appear daunting if you’re new to it. However, you don’t have to be a balance guru to walk the line. With a little effort and patience, you can master balancing on a slackline in no time.
No products found.
How To Choose A Slackline?
We recommend purchasing one of the many available kits for beginners and those just getting started with slacklining. A decent kit costs anywhere from $50 to $140, so I suggest investing in a low-cost kit to see whether you enjoy the activity.
Why Do I Need My Slackline?
Slacklining is a chaotic activity. You’ll learn it quicker by going for your slackline kit and getting outside to practice. When you have your kit, you are responsible for the maintenance of it. They want to be taken to the park and walked all over! Take responsibility for yourself and the practice by owning it.
To begin with, any slackline kit will suffice. A basic setup or a ratchet kit with a 15m length is all you need to get started. You must first learn to balance on a slackline before progressing to more advanced skills. So, even if your roof rack is equipped with only a transport strap, you may still practice balancing on
You’ll be able to take things to the next level in only a few months if you put in the time and effort. You’ll need to upgrade your kit if you want to slackline on advanced lines.
How Do I Set Up A Slackline?
Setting up my slackline was one of the most challenging aspects when I first purchased it. It was either excitement or pure impatience to walk on it, or simply being a knucklehead, but the bulk of my first slacklining activity was spent trying to figure out where and how to put up the thing.
Step 1: Choose Your Location
All you’ll need is a clear area with sturdy structures that will allow you to wrap your line around. Trees, columns, poles, and any two tall and robust constructions will suffice, although we recommend using two strong trees from a local park or your own yard. The bark provides some friction for the line to stay put and rocks gently when parked.
Step 2: How To Set Up Your Line
Beginners will want approximately 15-25 feet of distance between their two trees. The shorter the distance, the more stable your line will be, making it simpler to find your balance. This may result in a lot of extra lines, but don’t worry; it won’t be in the way and you don’t need to use the whole thing.
If you bought a kit, the instructions are straightforward to follow, but they leave out some crucial details.
Around a tree, you’d want your loops to be around upper thigh height. For example, a slackline draped over a tree. When the line is stretched between trees, it will be approximately waist-high.
Because you must balance on the line, having it set up at this height will allow for 6-12″ of sag in the line as you try to maintain your balance.
Tighten your line using the kit’s ratcheting system until the loops around your anchors (trees) do not move. As you get more experienced, you may vary the tightness of your line to produce a variety of degrees of difficulty.
The easier it is to walk, the more bounce there is in the line. However, this also makes it an excellent line for tricks.
How Tight Does My Slackline Need To Be?
A slackline is a kind of unpredictable ground that you must balance on. It’s the polar opposite of standing on solid, permanent earth that doesn’t shift and is always there.
When you’re on solid ground, it’s easy to forget how used to it you are! What is the ideal slackline length for novices? Make your slackline as short as possible. It’s 3-6 meters or 10-20 feet long. If the slackline is moving around too much, ask a friend or relative to help out!
How Can I Start Slacklining?
Over the years of instructing slacklining, I’ve noticed that most people are so preoccupied with crossing the line that they forget to enjoy themselves. Keep in mind that in order to walk a slackline, you must also be able to a standstill. You must be able to balance and retain control throughout every interval.
We usually start by offering a challenge – how long can you stand still on one spot? How long can you perform that and only on one leg? Now try it with your weaker limb? Finally, be comfortable in all postures; therefore, practice for all the possibilities.
Finding it Difficult To Find Your Balance?
The average length of time a person can stay on the slackline initially is only a few seconds. When you first start, it’s normal to be frustrated and defeated.
That is why, when you’re starting to develop confidence and have a feel for walking the line, we recommend enlisting the aid of a friend. Get a buddy to walk beside you with their arm out. You may hold on to their arm as you go for balance assistance or let go and just grab the arm when you begin to lose your balance.
When most individuals put their first foot on the slackline, it begins to shake. We don’t pretend to understand the biomechanical or neuromuscular reasons for this; we just know it happens. After your first few sessions, this usually subsides once you’ve built some muscle memory.
This is why having a little help at the start is so essential. It allows you to build familiarity and muscle memory more quickly on the line.
How Can I Learn New Slacklining Skills or Tricks?
There are hundreds of slackline videos on the internet. All of these are excellent sources of inspiration and learning. Spend some time watching slacklining movies.
Conclusion: Keep Slacklining On!
The more you do it, the better, but you don’t have to spend hours each day to improve. A 20-minute session should be enough, but even if you can only squeeze in 5-10 minutes each day, consistency will pay off as you’re attempting to rewire your nervous system.
The most essential thing is consistency. Shorter but more frequent exercises will allow you to improve much more quickly than a single lengthy session each week. Schedule some time in as frequently as possible if you really want to get better. If at all feasible, leave your slackline out in your backyard and use it whenever you feel like it.
Another crucial point to realize is that your nervous system and muscular system need time to warm up, so don’t be put off if you struggle at first.
You may help speed up the process by performing brief warm-up procedures such as squats, lunges, or tip-toe walks across your ground.
Amazon and the Amazon logo are trademarks of Amazon.com, Inc, or its affiliates.

Welcome to my site. I am Clyde Rutz. I am 22 years old. I am a SlackLine specialist. You can ask any question to me. I will try to back soon as early as possible.


